Blog
The ramblings of a programmer on a quest to learn a little bit of everything.
HTML Basics
It is said that a journey of a thousand miles begins with a single step. Building a website however, can begin without leaving your desk. That being said, I wouldn't recommend that route - I went for a bike ride a few days ago and the exertion almost killed me. Get your exercise! Joking aside, you will be glad to know that you can start making a website with tools that you already have on your computer right now. All you need is a text editor (all windows computers have notepad, and if you want something a little bit nicer, I use notepad++ which is a lightweight editor but a little bit more powerful than notepad alone. Try to avoid using something Microsoft Word - you want to be able to pick your own formatting and save with whatever file extension you want. The other thing you need is a web browser, but if you are reading this, then you've already got one!
Alright, to get started, we'll make what is quite possibly the most basic HTML page. Open your text editor, and write the following code:
<!DOCTYPE html>
<html>
    <head>
        <title>My First Page</title>
    </head>
    <body>

        <h1>My First Page!</h1>
        <p>Hello World!</p>

    </body>
</html>
This is some pretty simple code so I'll explain quickly - the first line specifies what type of HTML we are using. I haven't had to worry much about this, just know that when we write 'html' and nothing else, it indicates HTML5 (which is amazing, and you should use it). Next, the whole document needs to be contained within HTML tags (a tag is an HTML element started with <tag_name> and ending with </tag_name>). Then the document is split into two parts, the head, which contains meta information and things specifying how to display the page (eventually including CSS, but we'll get to that later), and the body which contains the actual page content. Our head only includes a title - that is the name that will appear as the window title, and our body has a heading (which uses <h1> tags) and a single paragraph (which uses <p> text). Now save your file (I would recommend calling it index.html - index is the standard name for the home page of a site), and open it using your web browser. You should see something like this:
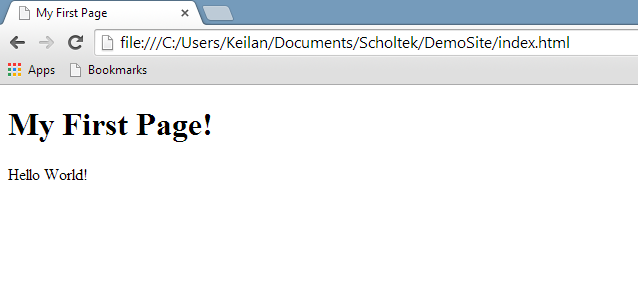
And there you have it - your first webpage. It doesn't look like much, but you have to start somewhere. I won't cover many more tags in this post - there are hundreds of them and it is best to discover them as you have need. As I mentioned in the first post, there is a great tutorial here that can give you a more detailed introduction. I will, however, leave you with two more pieces of HTML to make some more interesting sites. The first, is the <a> tag, which is used for inserting links into a post, and the second is the <img> tag which is used for showing pictures. They look like this:
<a href="scholtek.com"> Link Text </a>
<img src="./pictures/main/firstpage.png" alt="Chrome Display" height="303" width="638"/>
These code snippets also show you "attributes", which are bits of information included in the HTML tag that specify details about what you'd like to display, such as the source (src) of an image. Thanks for reading and I hope this helped - feel free to send your comments to contact@scholtek.com and I will post about adding some colour via CSS soon!
First Steps to Building a Website
When the idea to start a website first pops into someone's head, the initial thought is that they have no idea how to even begin. I know, because that was me - about two weeks ago. So if you're reading this hoping for a step-by-step guide from a wise sage, hardened by years of battle against the storms of changing web standards and wielding a unix command line as a weapon so familiar it has become part of him, you should hit back and continue surfing the google results that brought you here, because I am not that sage. But I hope to offer something that sage can't - the perspective of a beginner. Many of the tutorials I looked at while making my site presented steps as if they were simple, when in reality there were dozens of steps needed to make them possible.
The reason I had so much trouble, is that I fell into the demographic of a tech-savvy individual who wanted to swim in the deep end, but had never even practiced wading through the kiddy pool. For many users, they don't want customizability, and if they never have to even think of things like PHP or JavaScript, they consider it a victory. If you are one of those users, then you should click here and give WordPress a shot - I kept a blog there for over a year and everything worked smoothly. But then I wanted something more than a blog - there are other more powerful tools for website creation such as Joomla or Drupal, and while those are valuable tools, they still didn't give me the control that I wanted.
So if you are like me, and want to get into the dirty work of web design, then I'm hoping this post can give you a bit of a head start. Now, I'm also going to abbreviate some of the steps - this is a road map, not an algorithm. But it will give you enough to dig in, and finish the day with JavaScript stains on your shirt and CSS under your fingernails (going back to my getting dirty metaphor). So here is my list of steps to take, and roughly what they mean.
- Learn HTML - I used this tutorial. The advantage of HTML is that it is easy to play around with. Create a file called "mysite.html", use what you learn in the tutorial and open it with your browser. No hassle. HTML is used to display the content on your page (and not the way it looks! Color, alignment, general prettiness comes later). Don't worry about anything really complicated - just picture a simple site and work with HTML until you can build it - you can learn the complicated stuff later.
- Now learn CSS - There is a good tutorial from the same site.
CSS is used to control how your page looks. I've found it is best to keep HTML and CSS separate. So at the top of your HTML
file, you have a line like
<link href="styles.css" rel="stylesheet">which specifies how things look. So remember, HTML tells the website what to display, and CSS tells it how it should look. - Register a domain. Once you have HTML and CSS you can make some simple pages. Start with a home page with no fancy graphics, just an explanation of what your site is. That is enough to get online. First you need to register a domain - that is the step where you get a web address (like scholtek.com) that only you can use. Registration is the part where I pay a fee (around $10 a year) to tell the world that an address is mine.
- Find a host. This was one of the hardest steps for me - there are so many hosts and I find it hard to pick between them. I ended up choosing HostGator because of low prices and great reviews (so far I am happy with them). The host is the company that actually puts your website online. So they have some room on a server that you can put files on and a way to connect them to your domain name. So when you type scholtek.com, that points to a server owned by HostGator, which gives you the files that I write and upload. Connecting your address to your host is easy, but varies depending on which company you use, try googling for instructions.
That should be enough to get you started. In the future, I'll write a detailed posts on each of these 4 steps and hopefully talk about some more cool stuff like PHP and JavaScript. Happy building!
First Thoughts
As I mentioned on the homepage, this is my first experience really building a real website. Of course I've encountered HTML before and so am not completely new to this world, but my knowledge of CSS, PHP, and JavaScript was basically limited to knowing that they exist. So far what I've built has required a lot of HTML, some CSS, and a little bit of PHP (more on that in a minute).
The first thing I've realized, is that I am reinventing the wheel in an epic fashion. So much so that I need a bigger metaphor. This is like reinventing the microchip. Or planning to build an airplane and starting with learning to make a fire by rubbing sticks together. In the past I've had a blog using Wordpress. Complicated formatting was as easy as using Microsoft Word and posts were automatically indexed, and tagged, and had comment sections, and so on. Thinking about this blog, I'm realizing that I'll need to implement all that. And it will take quite a bit of learning. Now, down the road I might use existing tools to add features, as I only want to do something myself if I feel like there is an education benefit to it. Reinventing the wheel is pretty boring if you don't have a reason to know how to invent a wheel. One of the primary questions I'm pondering at the moment is how to store my blog posts. I want them to exist as separate pages so that I can have comments and track stats for individual posts and so on, but I also want the viewer to be able to see them all on one page. I'll let you know what I come up with.
A more immediate problem is what gave me my first tiny taste of PHP. I've been told it's a horrifying language to be avoided at all costs, although I haven't used enough to see if that is true quite yet. My problem was a simple one - code reuse. As a desktop app programmer, code reuse is like the golden rule. If you write the same code twice, you're doing something wrong. However, on this site I found myself maintaining footers and headers and navigation bars on every page. And even with 5 pages, updating those things was tedious.
Searching around the web for solutions, I came across this page which contains a method called PHP-Configured HTML. The basic idea is that ALL shared content is generated by a php script which takes parameters like the page title (and many more that I'm sure I'll add in the future as things get complicated) and then each individual page only needs two php require statements. At this point, it feels like a simple and elegant solution. Here is what my "About Me" page looks like.
<?php
$TITLE_PARAMETER='About Me';
require_once("header_script.php");
?>

<div class="contents">

  <div class="page-header">
    <h1 class="page-title">About Me</h1>
  </div>

  <h2>Content</h2>
  <p>Content?!? I love content!</p>

</div>

<?php require_once("footer_script.php") ?>
Simple, clean, and elegant. It makes me feel warm and fuzzy inside.